Wednesday, August 31, 2011

Vintage Modern: Wines Crates


I recently moved and the best way to describe our storage situation is:  strange.  We have an over abundance in the bathroom and not enough in the kitchen, with a strange cabinet on the other side of the bar where we store our pots and pans.  In the process of moving, I forgot to remove my shelves from the old apartment.  It was a sad sad day when I realized that I had no place to put all my do-dad's and foo-fa's.

So imagine my excitement when I found three wooden crates at an estate sale.  I had seen pictures of this while stumbling online and thought, "Hey what an great idea....I can do that!"  So I did....

I've also fell in love with peacock blue and basically covered everything that would stand still in the color.  I tried to paint Yoda but he was having none of it!  I slapped paint all over the crates like a 3 year old and the result was nothing short of imperfect....or perfectly rustic as some would say.


Here are some other great wine crate storage ideas!


Monday, August 29, 2011

Saturday, August 27, 2011

Yoda Loves Borders

We all have our vices and guilty pleasures. Mine is buying books...in bulk. Much like potato chips....I can never have just one. Yoda is obsessed with licking plastic shopping bags....and sometimes it gets him into trouble.


Clothespins! Who Knew?!


When David M. Smith invented the two-prong clothes pin in 1854, I bet he never imagined that they would be such a big hit with crafters in 2011. I was recently inspired by a post I saw on nobiggie about hanging multiple clipboards on the wall to organize your home office or craft nook. Living in a tiny apartment means you have to use every single space available, which means all vertical spaces too!


I modified this idea a bit by using clothes pins instead. Here's
what you'll need:
Clothespins (find these are Walmart, Target, or any craft store)
Command strips (these are a must if you rent! I use them EVERYWHERE and for EVERYTHING)
Scissors
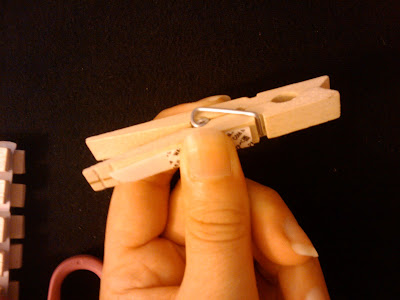
If you want, you can personalize your clothes pins. Paint, decoupage, go crazy! Start by cutting the Command strips down the center so they fit the clothespin better.


Press and hold for 30 second to make sure they bond. Next, do the same to the wall. Press and hold the clothespin with command strip to the wall for a good 30 seconds to make sure they really bond. Wait about 24 hours before hanging anything from the clothespins. Sometimes the weight can cause the command strip not to adhere to the wall.


Wednesday, August 24, 2011

Are you there friends? Its me Audrey


In case you were wondering....yes I'm still alive! Our move was very successful and I'm happy to be getting back to work on the blog and new website! I have been in a decorating/organizational frenzy and now that most everything is in its place, I can have a little fun here!

Since I can't sleep tonight, I've been doing a little surfing with stumbleupon and found a tutorial on photo printing onto fabric.


In the tutorial they printed on a hair ribbon but this technique can be used on other fabrics as well. I'm also curious to see how well it works on paper! Click here for the full tutorial from upcraft.it


Related Posts Plugin for WordPress, Blogger...